10 Expert Painting Tips for DIY Homeowners
As a DIY homeowner, your to-do list is likely never-ending. And with so much to do and so little time to do it, you may find yourself rushing through the task at hand. You may even skip over steps that seem frivolous to new homeowners. But often, prep work and minor details can make all the difference when it comes to your finished product looking like it was done by a professional or an amateur. Prep work is especially important when it comes to interior painting projects. But that’s not the only key to success. Inspect-It 1st has rounded up eight expert painting tips for DIY homeowners so your next painting job will look like it was done by a pro.
 The Painting Tips for DIY Homeowners You Need to Know
 The Painting Tips for DIY Homeowners You Need to Know
Don’t paint yourself into a corner, follow these tips to paint like a pro.
-
Clear & Prep the Room
Before you begin, move everything out of the room you’ll be working in, from the rugs to the doors. This also includes removing outlet covers, light fixtures, and hardware. If a piece of furniture is too big to move, cover it with plastic and move it to the center of the room. Put down canvas drop cloths to protect floors from drips and spills. Choose canvas over other materials because it is a thick fiber that will absorb paint drops and will stay put without tape.
-
Find & Fix Cracks, Dents & Imperfections
Using a hand-held light, inspect every inch of the surface to find chipped paint, rough edges, cracks and scratches. Mark these blemishes lightly with a pencil so you can find them again. Use a lightweight spackling compound to fill in minor flaws and plaster of Paris on deeper dents. For wood trim and crown molding, use a painter’s putty or two-part wood filler.
-
Sand for a Smoother Surface
Prior to painting, is smart to hand-sand the surface of your project, no matter what shape it’s in. Sanding makes the surface smoother, feathers out chipped paint, and creates texture to provide a better bond for the coat of paint. Sanding is especially important on surfaces that have been painted with a glossy paint finish, like trim.
-
Clean the Surface
After sanding, it is necessary to wipe down the surface with a damp cloth to remove dust and debris. Use your vacuum’s brush attachments on woodwork like window sills.
-
Caulk Your Cracks
Next, apply a thin layer of acrylic-latex caulk where the walls and the woodwork meet. For a professional appearance, cut the tip of the caulk tube smaller than your instinct tells you to and follow the adage, less is more. Caulking these seams will tackle drafts and makes your trim look brand new.
-
Apply Painter’s Tape
Trust us when we say masking tape won’t cut it. Invest in the blue painter’s tape. Painter’s tape will allow for clean lines and peels off easily, unlike masking tape that leaves a sticky residue. Remove the tape before the paint is fully dry, so it doesn’t strip off dried-on paint.
-
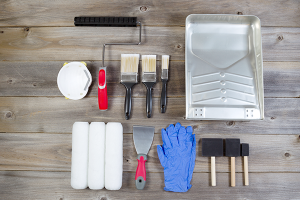
Select Quality Paint & Tools
When you go to purchase paint and brushes, it can be tempting to opt for the cheaper alternative. But there’s a reason why those tools are inexpensive– they produce low-quality results. Higher quality paint will go on smoother and provide better, longer-lasting coverage than cheap paints. Same goes for your painting tools; top-notch brushes and rollers contribute to a superior finish.
Make sure you have an angled brush for edging and a wool blend roller for large areas. Before loading your roller paint, use masking tape to remove excess fibers that could shed while painting, causing an unsightly appearance. And check out this guide to cutting-in, a crucial skill when it comes to edging, from This Old House.
-
Proper Priming
Whatever you do, don’t skip the priming step. If the surface already has a coat of paint or is in fairly good shape, using a paint-and-primer-in-one is fine. But if you attempting to paint over a darker color or a difficult are such as wood or concert, use a stand-alone primer. Primer will cover flaws and give you a smooth starting surface for your final color.
-
Work from the Top Down
Beginning with the ceiling, paint from the top down. Start with the crown molding, then move down to paint the walls and then the casement molding around the doors and windows. Paint the baseboard molding last.
-
Expect Touchups
Don’t assume that your paint job will be perfect. After the paint dries, go back over your work. Use a sponge brush to blend touch-ups into the rest of the wall. Apply paint with a dabbing motion to mimic the look of a roller.
Before you get started painting, make sure that your house is in tip-top shape with a home inspection from Inspect-It 1st. Our certified team members can perform pre-listing and pre-purchase inspections, construction phase inspections, condo inspections and more. Find an Inspect-It 1st inspector near you and contact us today to learn about how we can assist you with property inspections.